

Destinations › West › Utah › Zion Hiking Guide
Zion is a hiking park, but it is not a place to choose trails from a simple “top 10” list. Exposure, permits, shuttle access, river flow, heat and flash-flood risk can make two hikes of similar mileage completely different commitments.
This guide separates the famous hikes by skill and logistics so you can build a realistic day. The most important rule is to check official conditions again immediately before hiking, especially for the Narrows and any route affected by storms.
At a glance
| Trail | Best for |
| Angels Landing | Exposure-tolerant hikers with a permit |
| Scout Lookout / West Rim | Big views without chain section |
| The Narrows | River hiking when flow and weather allow |
| Canyon Overlook | Short scenic hike with limited parking |
| Watchman | Good shoulder-season half day |
| Pa’rus Trail | Easy sunset walk |
Angels Landing permits in 2026
A permit is required for the chain section beyond Scout Lookout every day and at all times. Zion uses seasonal lotteries plus a day-before lottery. In 2026, the fall seasonal lottery covered hikes from September 1 through November 30; day-before applications remain a useful backup for travelers who did not win the advance lottery.
The permit belongs to a specific group and time window, and rangers may check it on the trail. Download the confirmation before leaving reliable service.
Scout Lookout without Angels Landing
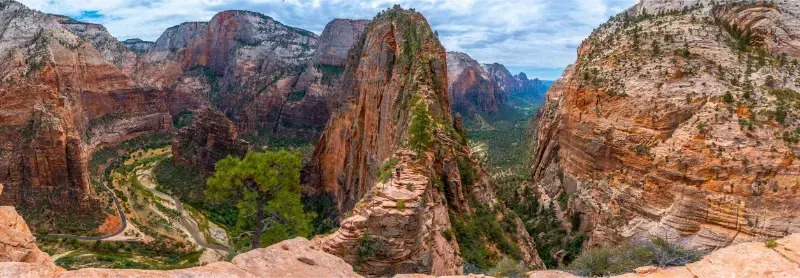
You do not need an Angels Landing permit to hike the West Rim Trail to Scout Lookout. For many visitors this is the better objective: the switchbacks and canyon views are excellent, and you avoid the narrow chain section.
Do not frame Scout Lookout as a consolation prize. It is a legitimate hike that delivers the same strenuous climb through Refrigerator Canyon and Walter’s Wiggles.
The Narrows: current safety rules
The bottom-up Narrows begins after the Riverside Walk at Temple of Sinawava and normally does not require a permit for a day hike. Zion closes the Narrows when Virgin River flow exceeds 150 CFS and when the National Weather Service issues a Flash Flood Warning.
Cyanobacteria are another concern. NPS advises visitors not to submerge their heads or drink river water. No recreational filter makes cyanotoxins safe. Check flow, weather and current health advisories before entering.
How far should you hike into the Narrows?
There is no prize for reaching a specific turnaround. Water depth, temperature and footing can change through the canyon. Many first-time hikers are satisfied with a few hours roundtrip, while stronger groups may continue farther when conditions are favorable.
Turn around while you still have energy. Downstream travel is not effortless: tired legs, slippery rocks and cooler late-day temperatures can make the return feel longer than expected.
Canyon Overlook
Canyon Overlook is short but not flat or fully protected from exposure. Its main logistical challenge is parking near the Zion–Mt. Carmel corridor. Arrive early, avoid illegal roadside parking and do not block tunnel traffic.
This hike fits especially well on the transfer day between Springdale and Bryce Canyon because it lies on the east side of the park.
Watchman, Pa’rus and easier hikes
The Watchman Trail starts near the visitor center and avoids the canyon-shuttle dependency. Pa’rus Trail is paved and works well around sunset. Riverside Walk provides canyon scenery even when the Narrows is closed or unsuitable.
Lower Emerald Pools can be a good family option when open, but trail closures and rockfall conditions change, so verify the exact segment rather than relying on an old map.
Observation Point and East Mesa
Observation Point once had the classic approach from Weeping Rock, but access patterns have changed after major rockfall closures. Many hikers now use East Mesa or other east-side access routes that may involve unpaved roads and shuttle services.
Check current NPS and local access information before promising this hike to a group. It is not as simple as riding the main canyon shuttle to a trailhead.
One-day hiking plan
Choose one major hike for the cool morning: West Rim/Scout Lookout, Angels Landing with a permit, or the Narrows when conditions allow. Use the afternoon for an easier walk such as Pa’rus or Riverside Walk.
Do not schedule Angels Landing and a deep Narrows hike on the same day. Both deserve fresh legs and flexible time.
Two-day hiking plan
Day one can focus on West Rim or Angels Landing, with Pa’rus at sunset. Day two can be the Narrows if river conditions are favorable, with Canyon Overlook on the east-side departure.
The order should remain flexible. If thunderstorms threaten on the first day, move the river hike rather than trying to preserve the itinerary.
Official resources
How to choose the right Zion hike
The best Zion hike is the one that matches the day’s heat, river conditions, permit status and the least experienced person in your group. Angels Landing, the Narrows and Observation Point are not interchangeable badges of completion: they involve completely different exposure, footing, transport and weather risks.
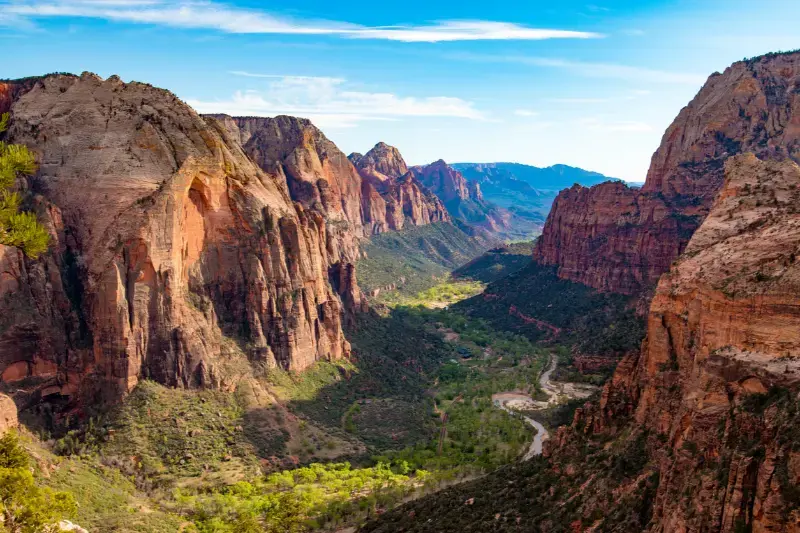
Build a primary hike and a backup hike every day. Zion is unusually good at rewarding that flexibility because a canceled Narrows day can become a West Rim day, while a missed Angels Landing permit can still produce a superb hike to Scout Lookout.
Trail etiquette and timing
Start early not only for cooler temperatures but also to reduce conflicts on narrow trail sections. Uphill hikers generally appreciate space, and groups should avoid stopping across switchbacks or chain sections. On river hikes, do not assume the person ahead has chosen a safe line.
Carry downloaded permit confirmations and offline maps. Mobile service can disappear exactly where you need information most, and late-afternoon decisions should account for the final shuttle out of Zion Canyon.
How this guide connects with the rest of Utah
Utah trips work best as connected clusters rather than isolated attractions. Use the related guides below to compare bases, reduce backtracking and decide which experiences deserve their own day.
- Zion National Park Travel Guide
- Utah with Kids
- 7 Days in Utah
- Best Time to Visit Utah
- Where to Stay in Utah
Practical planning strategy
Check the official land-management source again 24–48 hours before any weather-sensitive hike or unpaved-road day. Southern Utah can change quickly after storms, while northern mountain weather can alter roads and trail conditions at elevation. Download offline maps before leaving towns and never assume mobile coverage at a trailhead.
Build one priority activity per day and one backup. This simple rule prevents a permit, parking problem, heat wave or storm from ruining the entire schedule. It also gives you enough time to stop at viewpoints that were not visible when you planned the trip at home.
Frequently asked questions
Do you need a permit to hike Zion?
Most day hikes do not require a permit, but Angels Landing beyond Scout Lookout does. Some technical and top-down routes have separate permit rules.
Can beginners hike the Narrows?
Many beginners hike a short bottom-up section when conditions are good, but river walking is strenuous and weather-dependent.
Is Angels Landing necessary?
No. Scout Lookout, Canyon Overlook, the Narrows and other trails can make an outstanding Zion trip.
What is the best Zion hike with kids?
Pa’rus Trail and Riverside Walk are the easiest reliable choices; suitability of other trails depends on age, heat and current closures.
Final planning checklist
- Verify current road, trail and weather conditions.
- Download offline maps and save reservation confirmations.
- Carry more water than the minimum you expect to drink.
- Plan fuel before long scenic or backcountry drives.
- Keep at least one daily activity flexible.
- Avoid scheduling a long night drive immediately after a strenuous hike.
A final note on pacing
The most memorable Utah trips are rarely the ones with the highest attraction count. Red-rock landscapes are large, weather-sensitive and physically demanding. Give major parks and road corridors enough time for early starts, unplanned overlooks and a real meal at the end of the day. When a route feels too full on paper, removing one stop usually improves every place that remains.
For a first trip, protect sleep and daylight. Start demanding hikes in the coolest safe window, drive scenic roads while you can actually see them and reach the next lodging base before exhaustion becomes part of the plan. That approach is safer, easier for families and more likely to produce a trip you would willingly repeat.
Extra trip-planning detail
A useful way to test the itinerary is to imagine the day with a two-hour delay. If a parking queue, thunderstorm or slow restaurant would make you miss the final shuttle, reach lodging after midnight or drive an unpaved road in darkness, the plan is too tight. Add margin before the trip rather than trying to recover it on the road.
Also separate drive time from travel time. Navigation apps measure movement, not viewpoints, fuel stops, construction, wildlife, trailhead parking or the simple need to stretch after several hours in the car. In Utah, a beautiful two-hour transfer often occupies half a day once you travel at a pace that lets you experience it.
Looking for the right place to stay? Compare hotels and accommodation on Booking.com.